
So you have a new suburban area that you want to map, and want a head start on getting things going.
In this modern age, most government authorities are making much of their mapping data available as open source under some license.
This article shows where to locate cadastral data for any location in NSW, and how to simplify it for use in street orienteering maps.
Choose Area of Interest
In NSW, the major provider is Spatial Services within the Department of Finance, Services and Innovation. It has changed names and functions over the years – those who have been around a while may remember the LPI (Land and Property Information) at Bathurst. It was later renamed and replaced by the NSW Land Registry Services.
Anyway, the mapping data we seek is at https://maps.six.nsw.gov.au/clipnship.html
It is probably fastest to select the whole Local Government Area of interest, as custom minimum boundary selections took days instead of minutes to arrive for this project.
For Sydney, the Projection we need is MGA56 (at this point in time the option of GDA2020 Zone 56 is not available)
We’ll change the Format delivery to Shapefile for this project, although you could leave it as MapInfo (.tab or mid/mif) and adjust later during the import.
Ensure the Topographic/Cadastral radio option is set to Cadastral.
Move the map to your area of interest and click on the map. The LGA will be highlighted and pre-fill the options.
It doesn’t seem possible to select multiple LGAs. For my area of interest along the Lane Cove River, there are three LGAs to download.
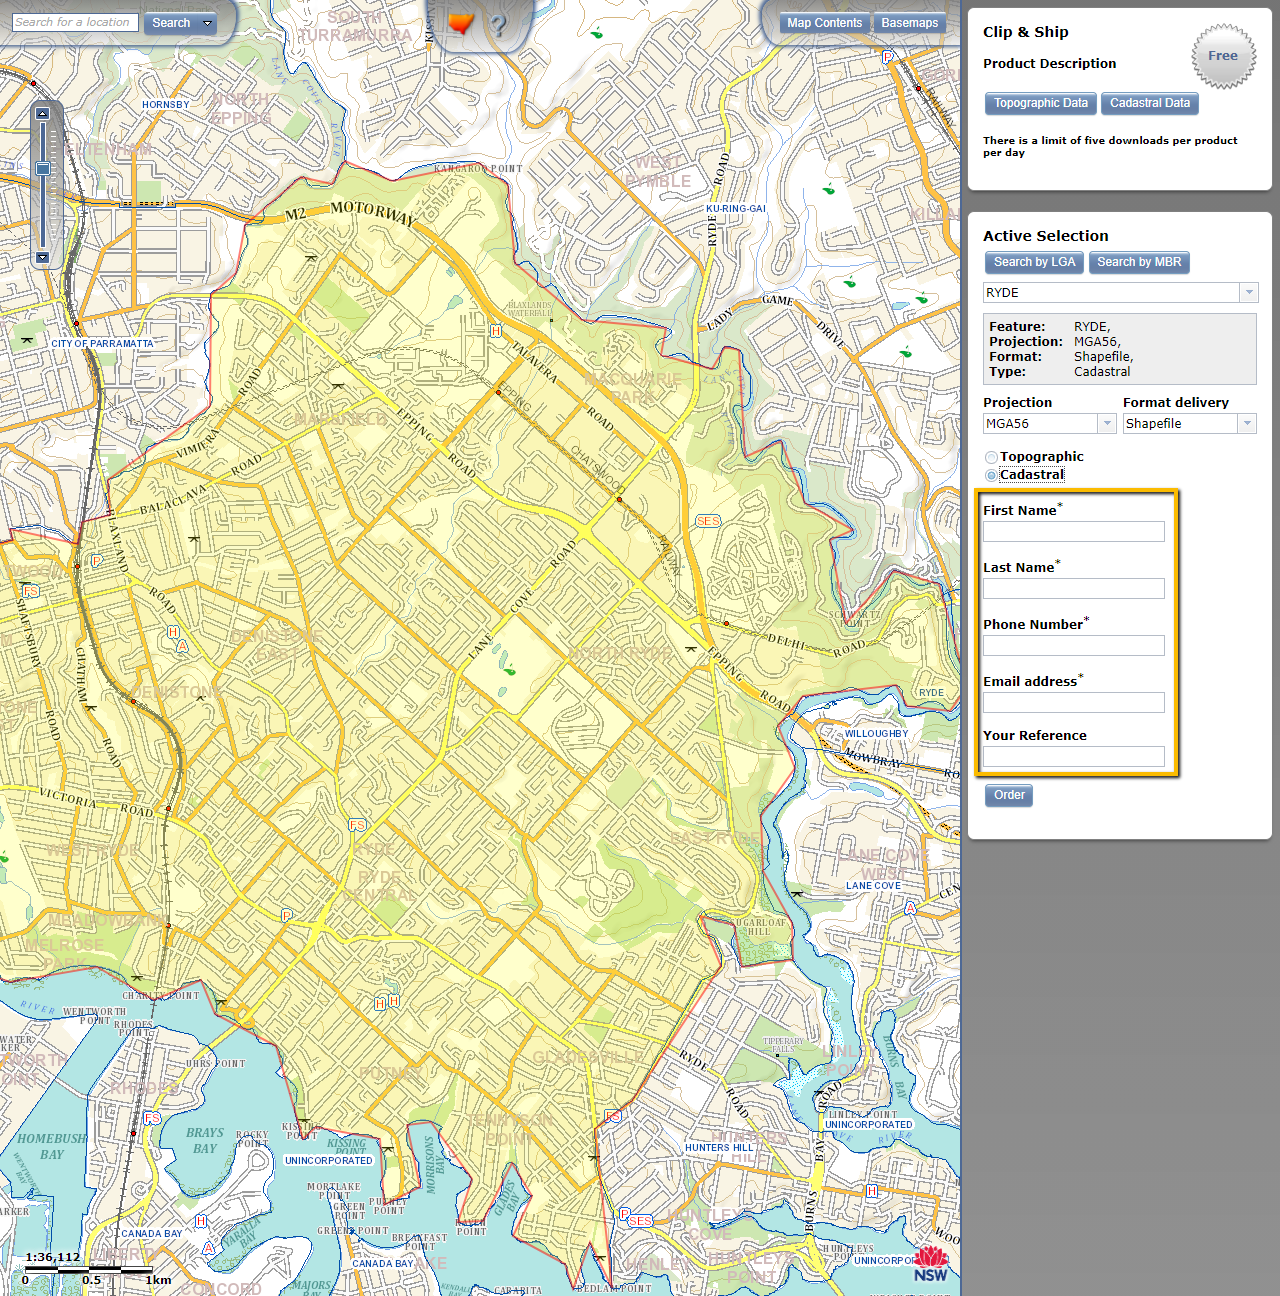
Fill in your contact details, and include a reference so you can keep track of your requests. I called this one Ryde LGA for easy reference. Use a real email because that is where the link to download will be sent.
A notification below the Order button appears.
Check your email for the link!
Download Cadastre
An email arrives that looks something like this:
You have received data from [email protected]
Use the secure link to download.
Spatial Services Data Delivery
Job Id: Ryde-LGA-20201019172924
Your data extraction request is now ready for collection
To access the data simply click on the link below.
For help and support please contact Spatial Data Services [email protected]
Secure File Download
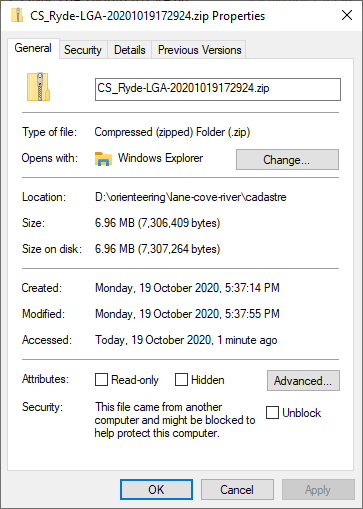
Click here to download the result: CS_Ryde-LGA-20201019172924.zip
See the “Ryde-LGA” part of the download? – that’s generated using the reference you supplied, together with the date the extract was processed.
Save the .zip file to a logical file location for your project. I’ve saved mine to a folder called “cadastre” in a project folder called “lane-cove-river”:
Unzip the folder and you’ll see a heap of goodies, including:
- County.shp
- Easement.shp
- FederalElectoralDivision.shp
- LALC.shp
- LandDistrict.shp
- LandsOffice.shp
- LLSR.shp
- LocalGovernmentArea.shp
- Lot.shp
- NPWSReserve.shp
- Parish.shp
- RailwayCorridor.shp
- Road.shp
- RoadCorridor.shp
- StateElectoralDistrict.shp
- Suburb.shp
- Unidentified.shp
- WaterFeature.shp
- WaterFeatureCorridor.shp
- Watermark.shp
The Shape files we are most interested in are the Lot.shp, and the RoadCorridor.shp. Let’s see what they look like in QGIS!
Open Cadastre in QGIS
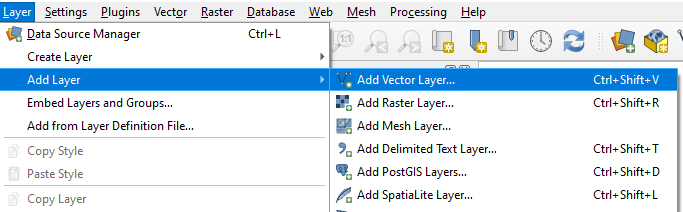
In QGIS, start a New blank project.
Add a new vector layer with either Ctrl-Shift-V, or go to Layer > Add Layer > Add Vector Layer…
Set the Source Vector Dataset(s) to the /cadastre folder from above, and choose the Lot.shp file.
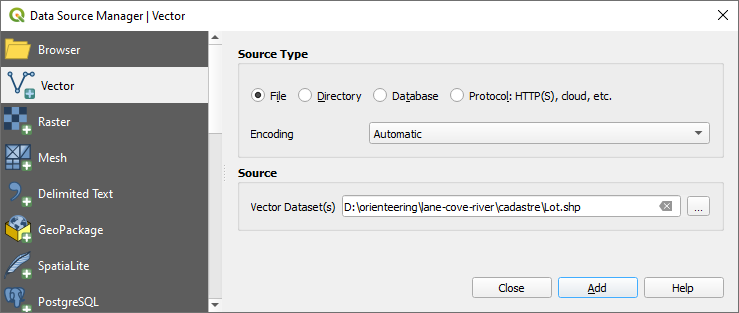
Click Add then Close.
Note: the projection of the map should be set automatically the projection information stored in the .prj file of the Lot Shape file – EPSG:28356 in the case of Ryde.
Merge datasets into master
For my area of interest in Lane Cove River valley, there are three Local Government Areas.
- Ku-ring-gai
- Ryde
- Hornsby
So it makes sense to merge the three LGAs into one master dataset that can be edited without having to do everything three times. Best of all the methodology of this project allows any map to be produced in those three LGAs.
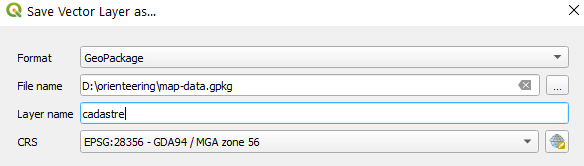
Right-Click one of the Lot layers and Export > Save Features As… and into a new geodatabase. I chose a File name of map-data.gpkg, with a Layer name of cadastre, in the root of my orienteering folder (d:\orienteering\map-data.gpkg)
To copy existing Lot files into cadastre.gpkg:
- Select one of the remaining LGAs Lot layers
- Right-Click and choose Export > Save Features As…
- Navigate to the existing cadastre.gpkg in the File name dropdown
Expand the Select fields to export and their export options accordion.Uncheck the fid field- The prompt says “The layer already exists..” Choose Append to Layer
- Uncheck the Add saved file to map option – it just gets confusing having two versions of the same file but one is missing the appended data.
- Click OK
Assigning Symbology to Parcels
To make an orienteering map, you need to follow the International Orienteering Federation guidelines for doing so. Everything is standardised so that every map is consistent around the world. Water features are blue, earth features are brown, and so much more. Colours are standardised, as are dimensions at certain scales, and more.
The specifications are available at https://orienteering.sport/iof/mapping/. In this guide we’re using the ISON 2017-2 edition for foot orienteering. (There are separate specifications for mountain biking orienteering and ski orienteering.)
We need a field to store the IOF symbol number.
- Open the Attribute table for map-data.gpkg with F6
- Toggle editing mode by clicking on the pencil icon in the top-left of the toolbar
- Add a new field using Control-W or click the mustard yellow icon
- Name the field symbolnumber and leave the type as integer. Optionally, add a comment like “IOF Symbol Number ISOM 2017-2“
- Save edits
Update Symbol Number
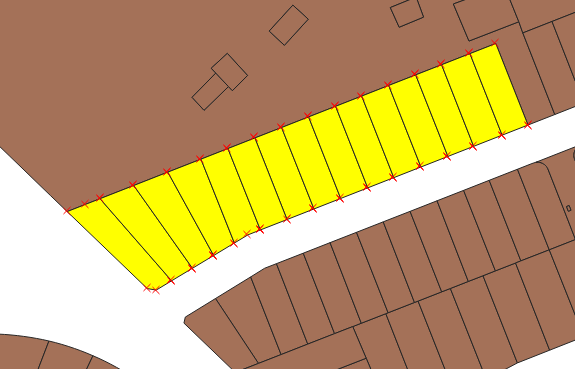
- Select a contiguous block of residential properties, e.g.
- Open the Attribute table if not already open, and change view to show only selected parcels (bottom-left dropdown)
- Change the field selector to symbolnumber (default is fid)
- Update the value of symbolnumber to 520.
- Click Update Selected
- Save the file edits
Now not much looks different, so let’s fix that!
- Select the map-data layer in the Layers pane
- Press F7 to open the Layer Styling pane
- Change the dropdown from Single symbol to Categorized
- Set the Value field to symbolnumber
- Click the Classify button. It won’t be very interesting as we only have 520 and NULL in the database right now.
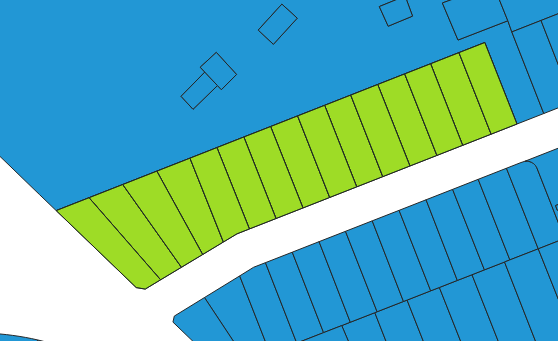
- Change the Symbol for 520 to follow ISOM:
- colour is yellow + green 50% according to ISOM
- click on the Symbol dropdown
- Click on the simple fill and change it to 50% green by clicking the Data Defined override next to fill colour
- Set the Expression to color_cmyka(76,0,91,0,127) which is 50% green
- Click OK
- Add a second Simple Fill by clicking the green “+” button
- Set the Data Defined Override to color_cmyk( 0,27,79,0) which is yellow
Unselect any polygons to see the new colour definition for Area that shall not be entered!
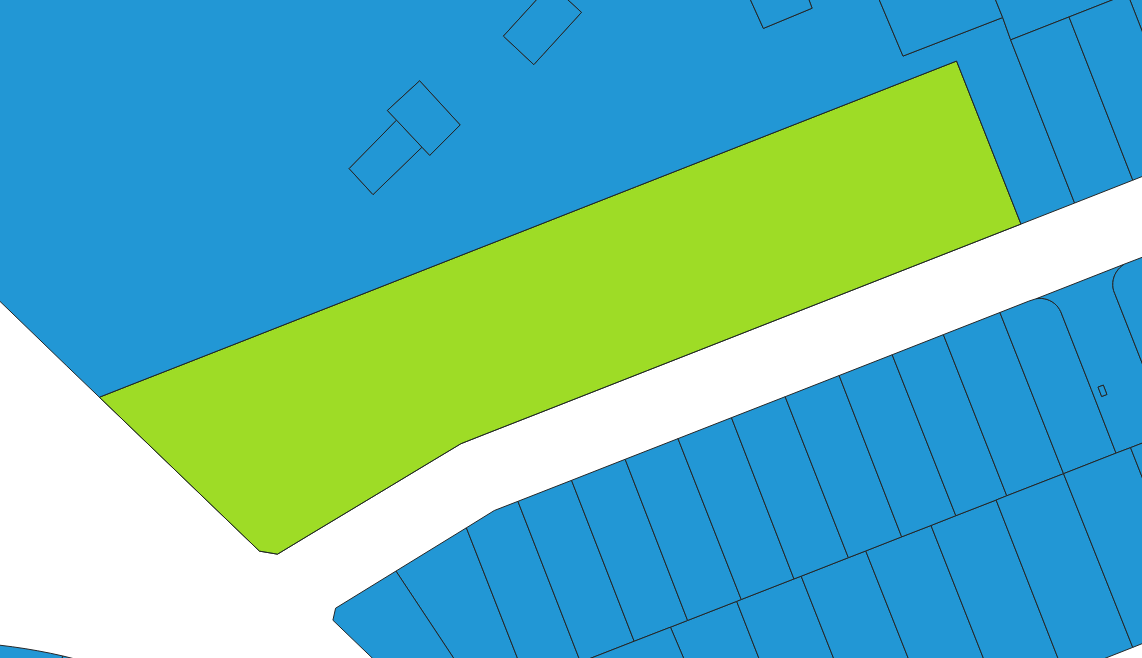
The last step is to merge the residential parcels. We don’t want black outlines for every house, just the block as a whole.
- Select the residential parcels from above
- Go to menu Edit > Merge Selected Features
- Accept defaults and click OK
| Colour | CMYK | RGB | HEX | Notes |
|---|---|---|---|---|
| Black | 0_0_0_100 | 0,0,0 | #000 | |
| Blue | 100_0_0_0 | 0,255,255 | #00FFFF | |
| Yellow | 0_27_79_0 | 255,186,54 | #FFBA36 | |
| Green | 76_0_91_0 | 61,255,23 | #3DFF17 | |
| Brown | 0_56_100_18 | 209,92,0 | #D15C00 | for CMYK+B PMS 471 |
| Purple | 35_85_0_0 | 166,38,255 | #A626FF | PMS Purple |
CMYK
Black: 0_0_0_100 => RGB 0,0,0 = HEX #000
Blue: 100_0_0_0 => RGB 0,255,255 HEX #00FFFF
Yellow: 0_27_79_0 => RGB 255,186,54 = HEX #FFBA36
Green: 76_0_91_0 => RGB 61,255,23 HEX #3DFF17
Brown: 0_56_100_18 (for CMYK+B PMS 471) => RGB 209,92,0 HEX #D15C00
Purple: 35_85_0_0, => RGB 166,38,255 HEX #A626FF or use PMS “Purple
There are other ways to perform the same process, but this is one approach that seems to work well.
Update
I was directed to a useful QGIS resource via a user.
Recent Comments